Elevar & Clarity – Enabling Better Decision Making

Elevar & Clarity – Enabling Better Decision Making

Understanding data, conversions, and customer journeys are key to making informed adjustments as well as understanding how people are using your product or website.

Elevar powers conversion tracking for direct-to-consumer brands on Shopify and Shopify Plus that rely on accurate data to make strategic business decisions. They do this by unlocking the latest in tracking methodologies with server-side tracking.
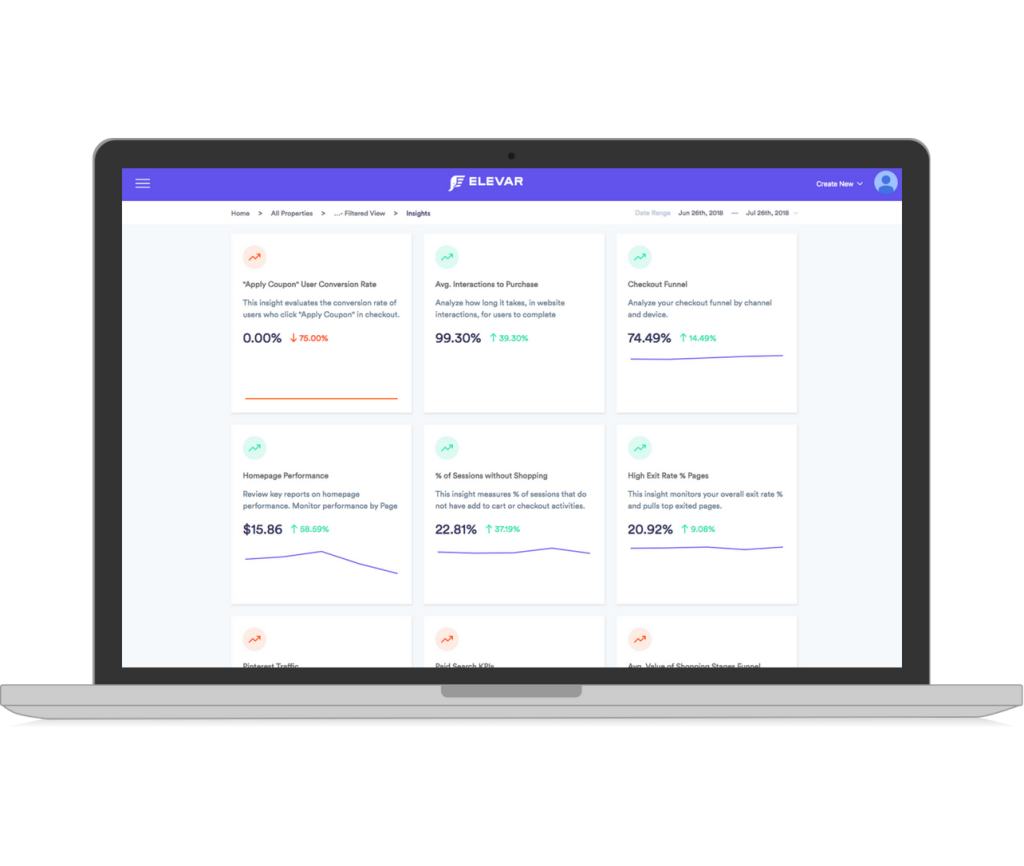
They transform shopping behavior into structured trackable events with attribution like UTM parameters, click ID’s, and customer data. You can connect your analytics tracking and marketing destinations like social media conversion APIs that rely on first-party customer data to match clicks to conversions. Once these events are captured, they can be directed to any ad or analytics platform the merchant relies on and needs to connect with in the format required by those platforms.

Once live, Elevar pushes 100% of consumer shopping and conversion data to the marketing channels. This data helps optimize the algorithms used by these channels to improve ad performance.

Elevar also has tag error reporting, channel accuracy reporting (to ensure all channels receive the data collected), and some attribution reporting.

Elevar offers an integration with Microsoft Clarity, adding behavior analytics insights in the form of Heatmaps, Screen Recordings, and behavior-focused insights. By combining Elevar’s conversion tracking capabilities with Clarity’s behavior analytics insights, you’ll be able to make better data-driven decisions as a marketer, analyst, or Shopify brand owner. Here’s how to get started with adding Clarity to Elevar.

Step 1:

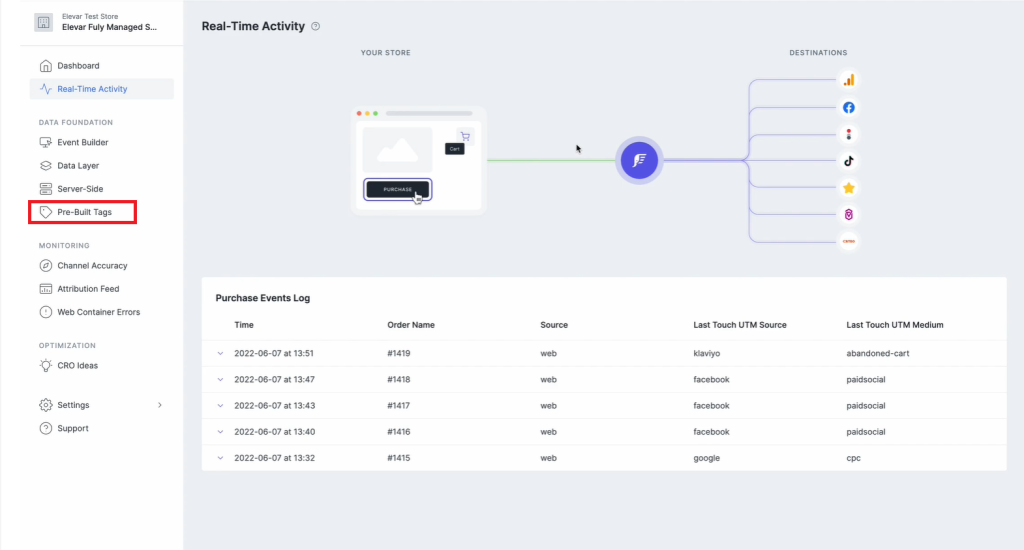
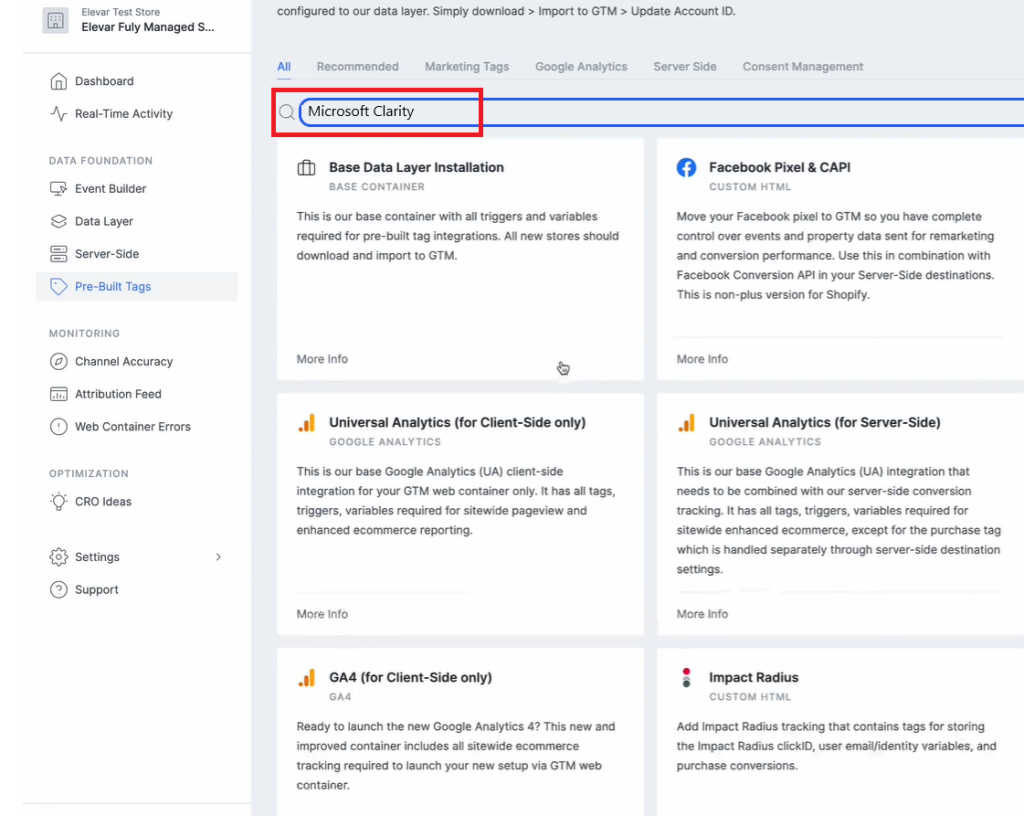
In your Elevar App, go to Pre-Built Tags.
Step 2:

In the Search bar, search for Microsoft Clarity.
Step 3:

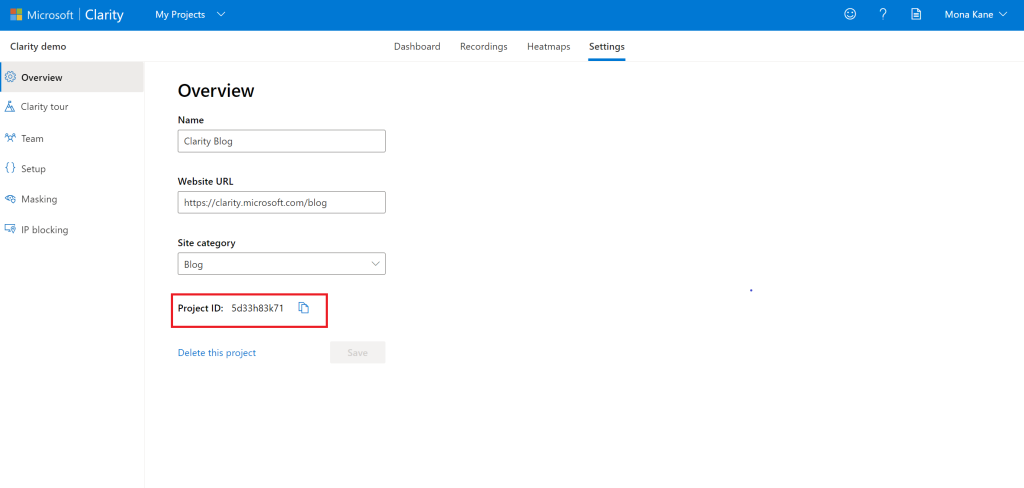
Locate your Clarity Project ID and copy it by following the below instructions:

  1. From the Clarity dashboard, go to Settings.
  2. Select Overview from the left panel.
  3. Copy the Project ID (for example, 55u86t0118).
Step 4:

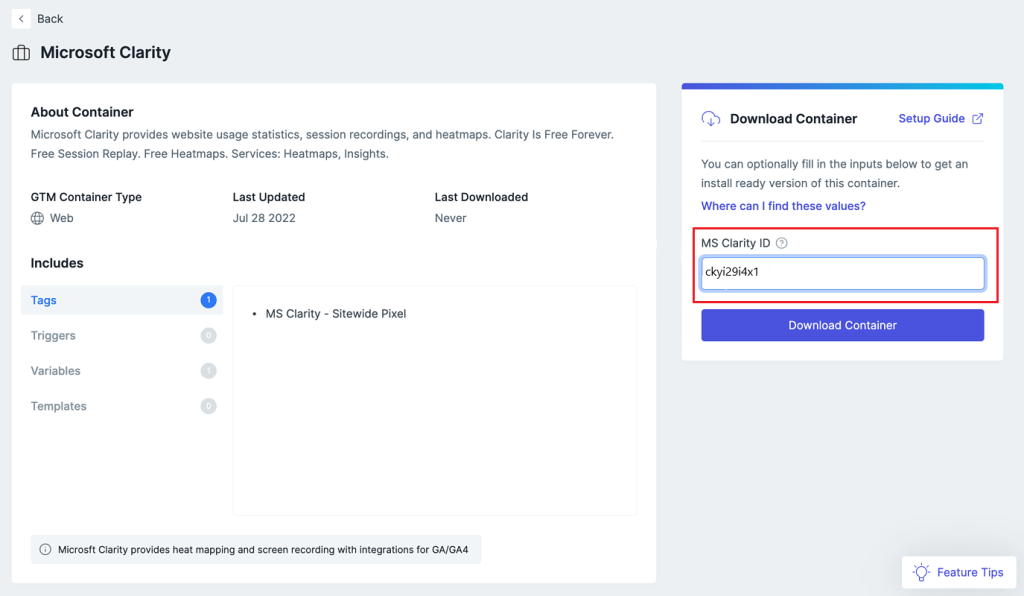
Paste the Clarity Project ID into MS Clarity ID. Select Download Container.
Step 5:

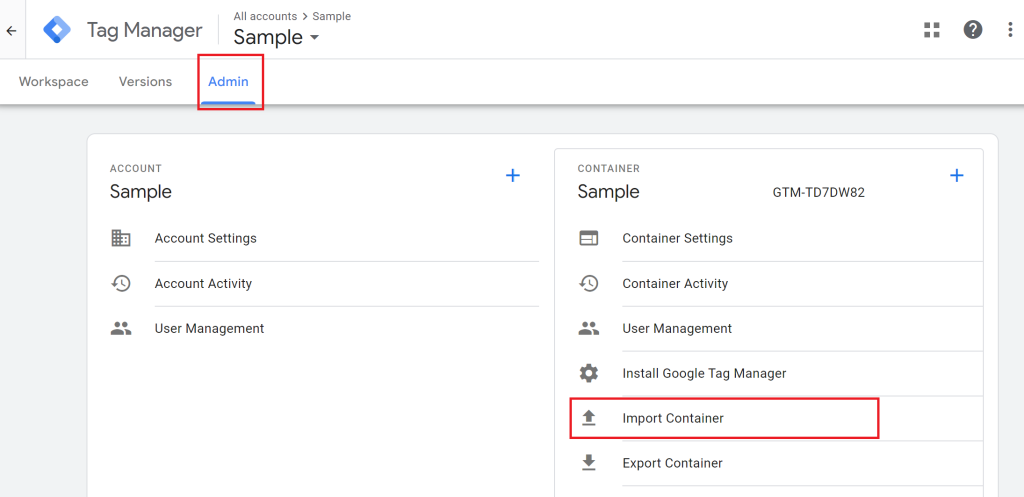
Sign in to your Google Tag Manager Account. Go to GTM Web Container. Select Admin > Import Container.
Step 6:

Select to import the file you downloaded in Step 4. Create a New Workspace and name it Microsoft Clarity Tracking. In Choose an import option, select Merge > Overwrite conflicting tags, triggers, and variables.
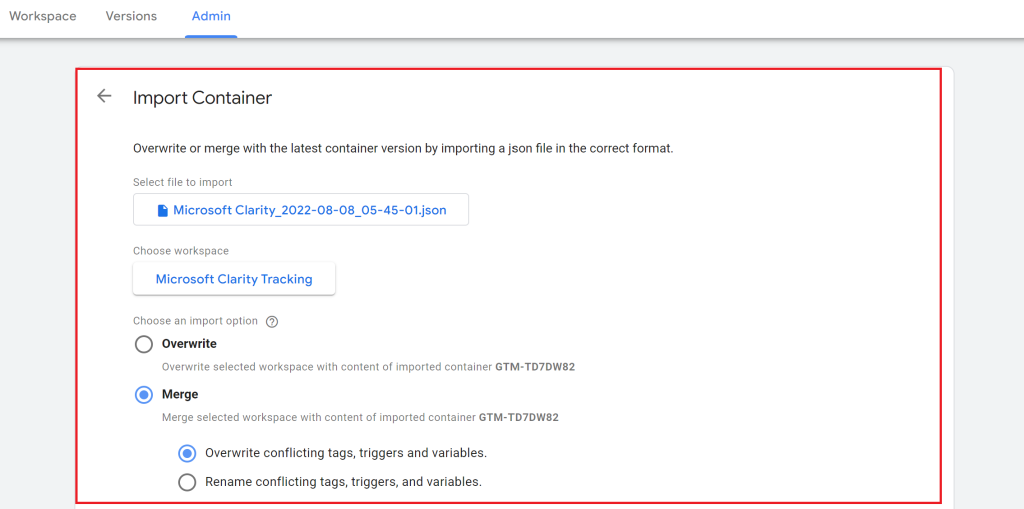
Select Confirm to import tags.

Step 7:

Go to Workspace. Select Microsoft Clarity Tracking in CURRENT WORKSPACE.
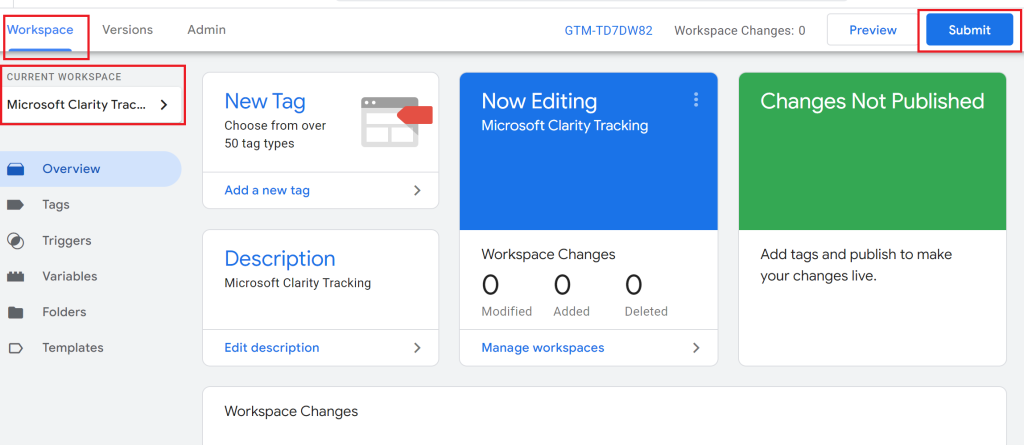
Select Submit.

Step 8:

Select Publish to save Submission Configurations and set your tracking live.
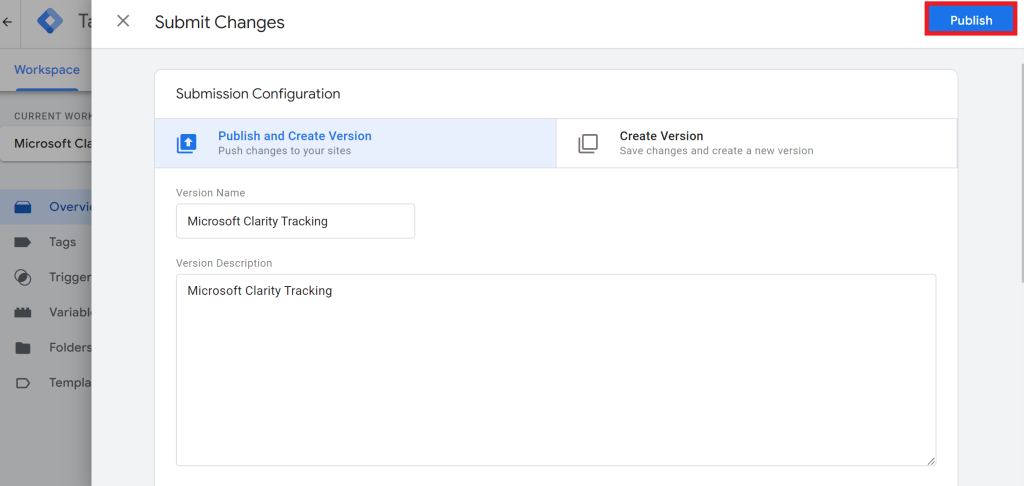
Start viewing Recordings, Heatmaps, and Dashboard data in a few hours.

Analyzify is now integrated with Clarity!

Analyzify is now integrated with Clarity!

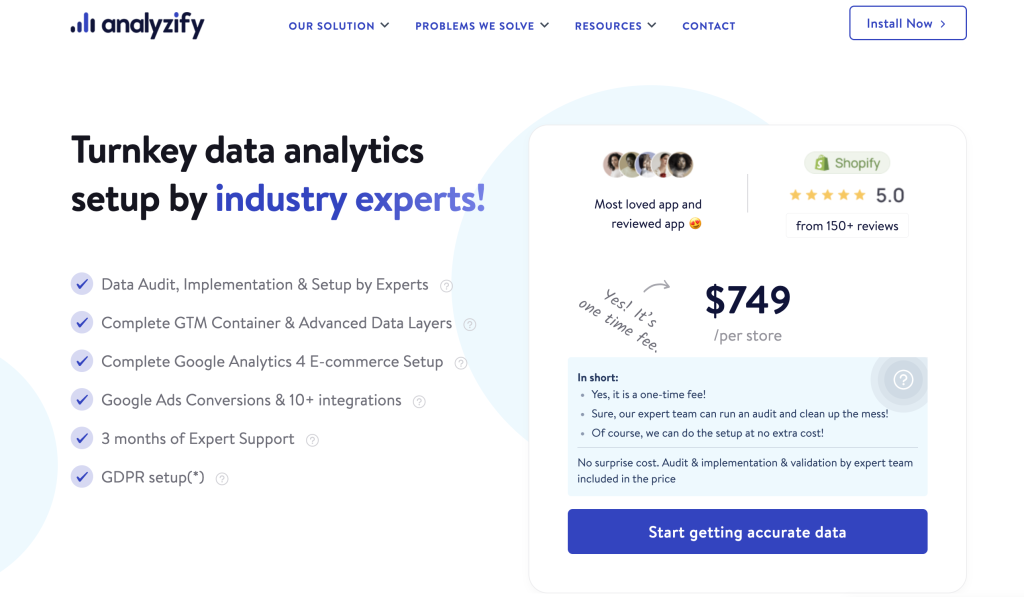
Analyzify is an all-in-one Shopify data analytics app that takes care of all your data collection and tracking needs for your Shopify store. You can set Analyzify up within 20 minutes to accumulate meaningful data through multiple channels. The extensive and diverse experience working with Shopify merchants means they know how challenging it can be to collect and evaluate the right data that allows you to make the right decisions based on real metrics. Analyzify makes that process quicker and easier for you.

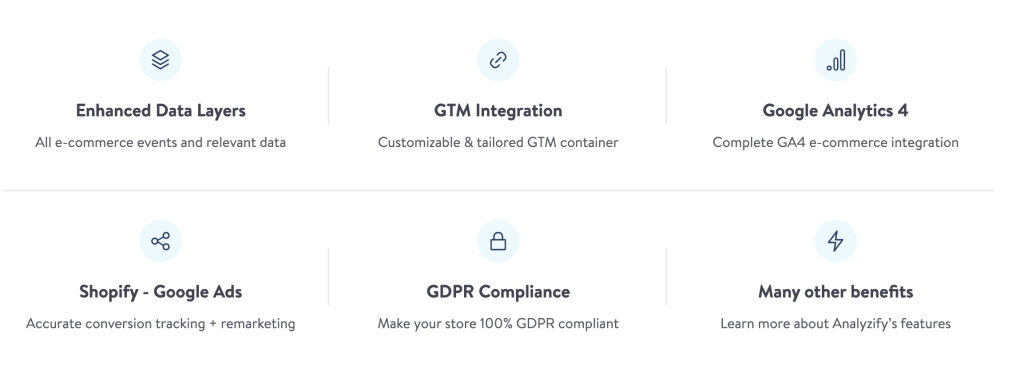
Analyzify gives you that much-needed insight into your Shopify store. Elevate your Shopify stores data and performance with enhanced data layers, Google Analytics 4 integration, Shopify Google Ads for accurate conversion tracking, and so much more from Analyzify.

Problems Solved

For some, this might seem a little intimidating or out of their field of expertise, but let’s cover exactly what problems Analyzify can help you solve.

Google Analytics

Almost every website uses Google Analytics to track their visitors’ data, but it doesn’t necessarily mean the data you’re getting is correct. Here are a few of the solutions you’ll receive with Analyzify:

  • Missing GA4 e-commerce data/reports
  • Make sure Checkout funnels are working
  • Payment & checkout providers in referrals (seeing Stripe, PayPal, etc. as referrals)
  • Google Analytics & Shopify data inaccuracy (Get accuracy above 90%)
  • Helps Correct Attribution Channels (Too much direct traffic)

Google Ads

Accurate and reliable conversion tracking is essential for running successful Google Ad campaigns with Analyzify, this is easily obtained.

  • Accurate & reliable conversion tracking using Google Tag Manager. Purchase, cart, user-level data is also included.
  • Missing conversions or counting multiple? Analyzify delivers the best solution for you.
  • Global Site Tag – dynamic remarketing setup errors
  • Wrong attribution model correction (90% of Shopify stores have incorrect attribution models)

Google Tag Manager & Data Layers

Not sure how to use GTM or Data Layers on your Shopify store? Don’t worry Analyzify has a team of experts that got your back. They will guide you through the setup and ensure everything runs smoothly and accurately.

GDPR Compliant

GDPR & GTM not working together? That’s a complex setup, but don’t worry—they’ve got you covered! GDPR compliance is a breeze with our specially-crafted GTM container. Analyzify is integrated with three different reliable cookie consent solutions, and we also provide audit & setup services for GDPR.

Clarity Integration

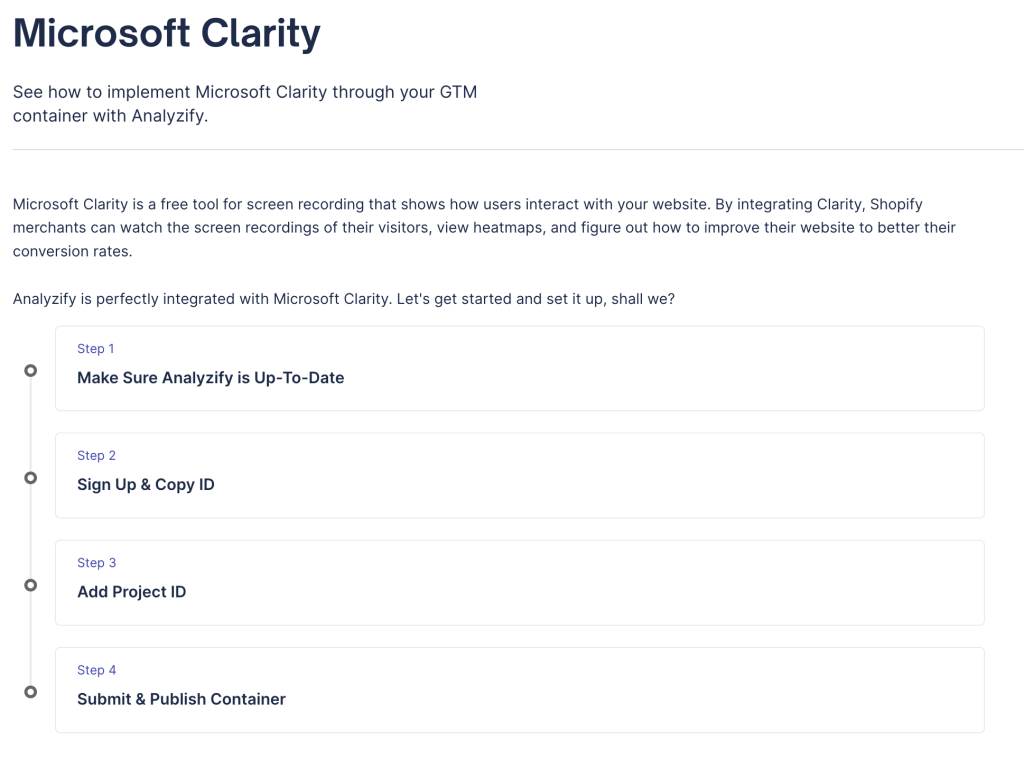
Analyzify was already amazing, but they got a little more amazing with their super simple integration with Clarity. You can be up and running with Clarity inside your Analyzify dashboard within minutes following these easy steps. With this integration, you’ll receive data and behavioral analytics to optimize your Shopify store.

Clarity Now Integrated With Optimizely!

Clarity Now Integrated With Optimizely!

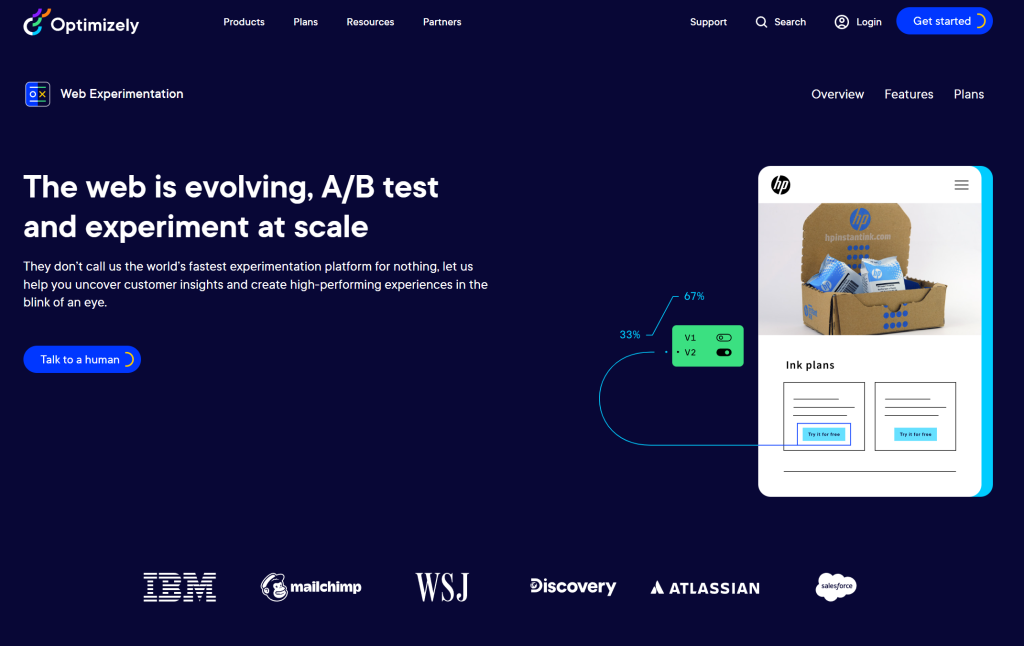
Optimizely on the Web lets you run A/B tests and experiments at scale. Optimizely Web Extensions are reusable templates that developers can use to create custom features for non-technical teams. It is an optimization platform that provides a way to test, validate changes, view analytics, and modify the default behavior of web pages to allow you to grow your business.

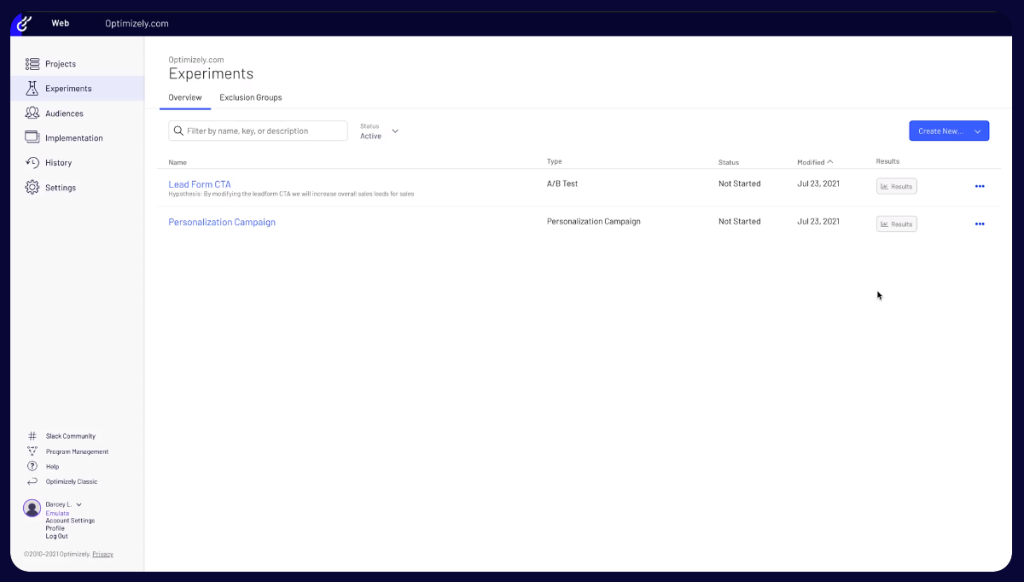
The Optimizely Web platform enables you to add and manage various experiments, as seen below.

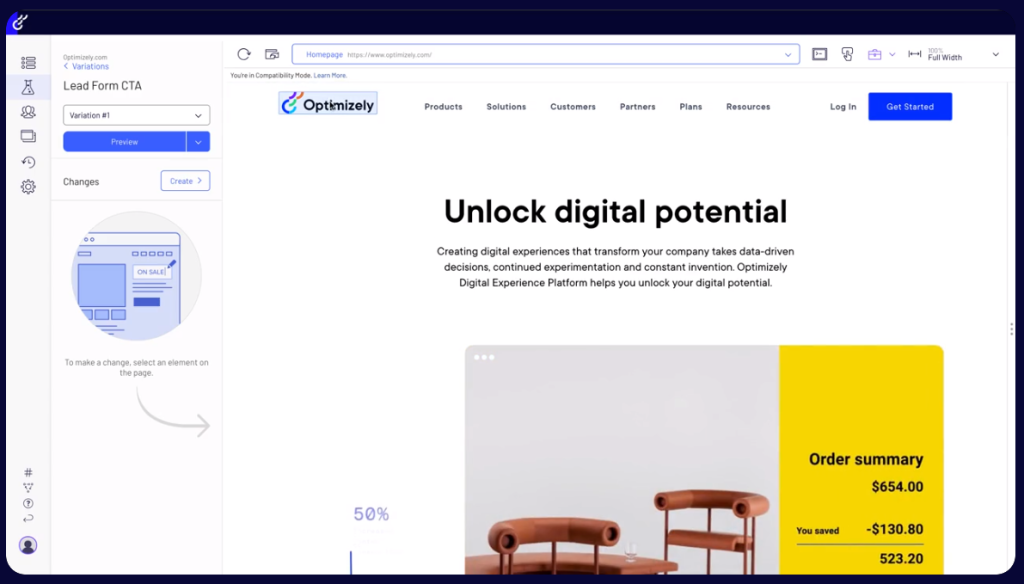
The visual editor allows you to implement changes on your site in minutes to change the experience of your customers. Quickly adapt to through experimentation to accelerate success, get ahead, and stay there.

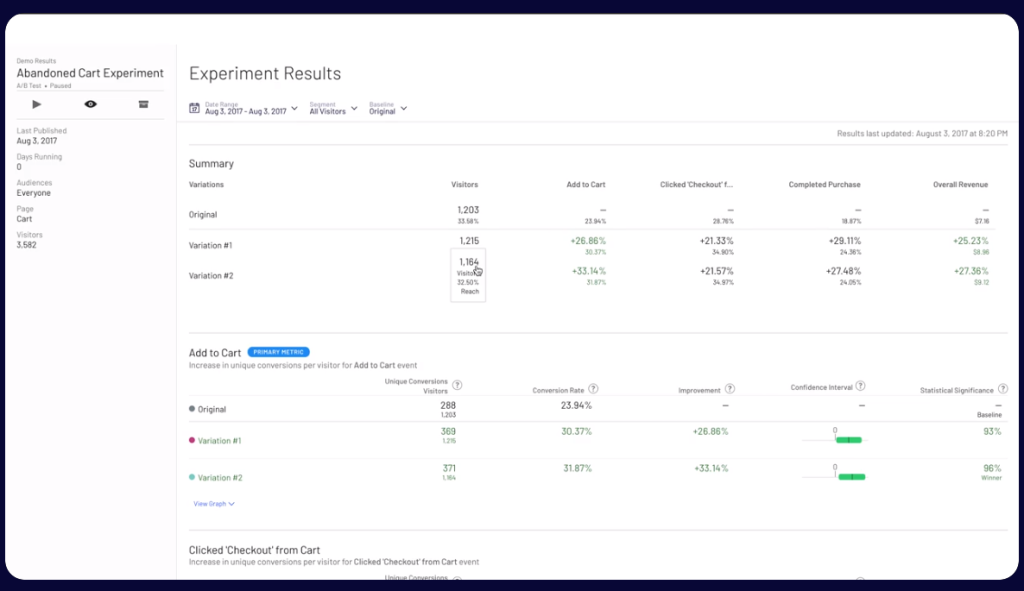
Also, quickly see analytics results all in one place.

Optimizely has added integration with Microsoft Clarity. Adding Clarity offers some great benefits.

  1. The opportunity to see behavior analytics across your website, enabling users to make key changes which would be otherwise elusive.
  2. This includes the use of Heatmaps, Clickmaps, and Sessions Recordings to see how users interact with your site, which is critical to understanding what changes to implement and why.
  3. You can also easily see Rage Clicks, Dead Clicks, Quickbacks, and other points at which users get frustrated.

Here’s how to get started adding Clarity to Optimizely.

Step 1

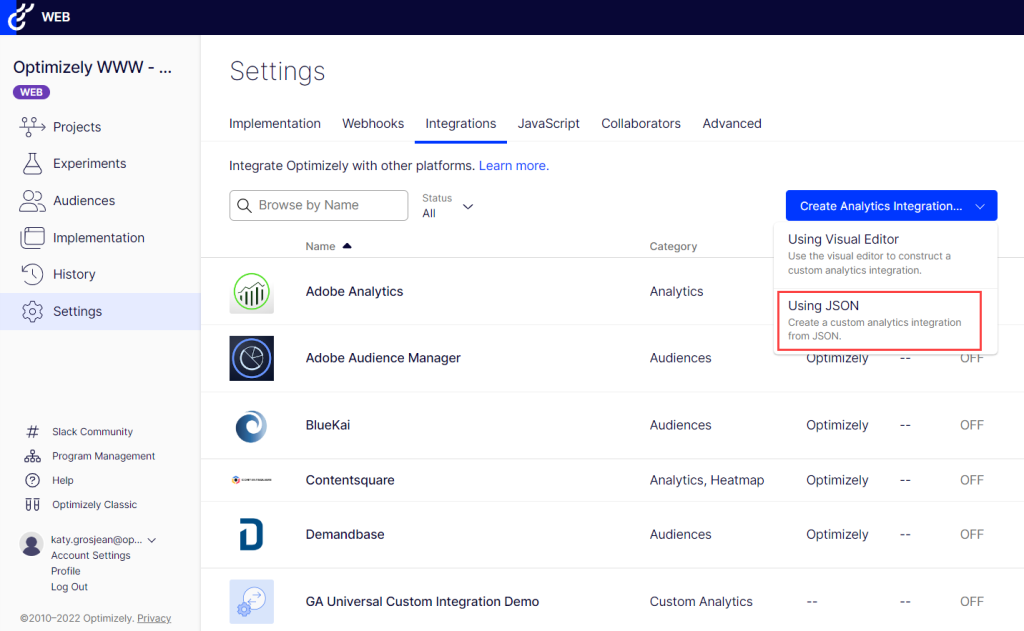
Sign in to Optimizely. Go to Settings > Integrations.

Expand the Create Analytics Integration drop-down list and select Using JSON.

Step 2

Paste the following code into the JSON field and select Create Extension.

Step 3

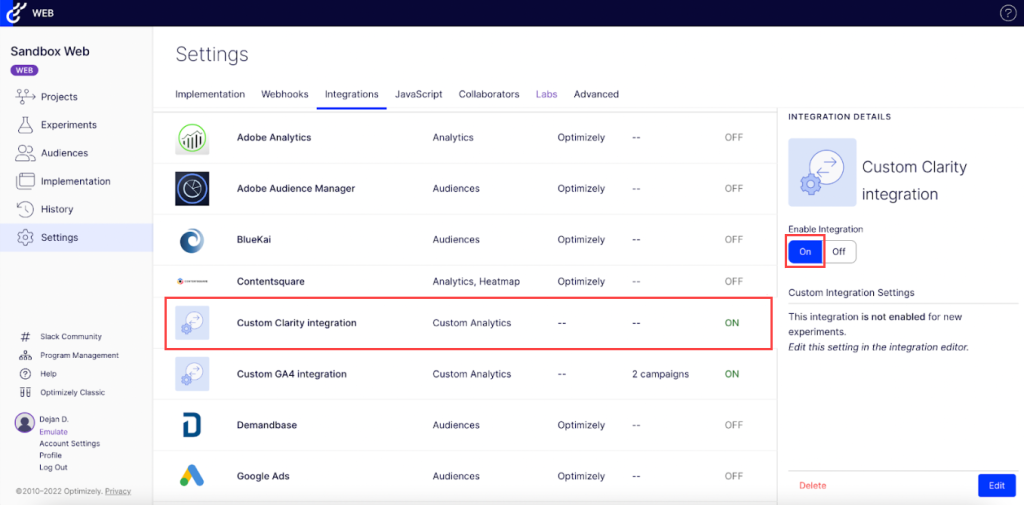
Go to Settings > Integrations page to view the custom integration you just added. Select Custom Clarity integration from the list and turn On Enable Integration.

Step 4

You can add the new integration to specific experiments in two ways:

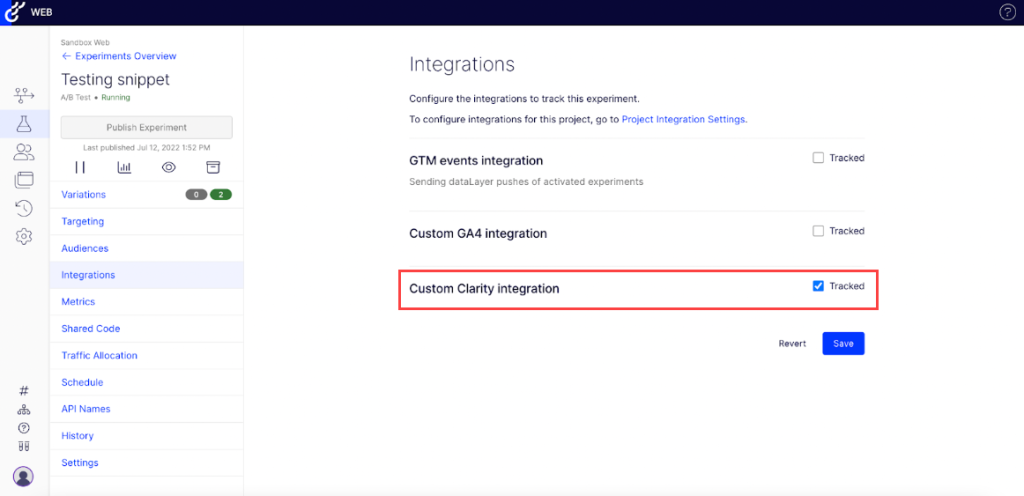
Manually add new experiments

Add the new integrations to specific experiments as shown below:

Automatically add new experiments.

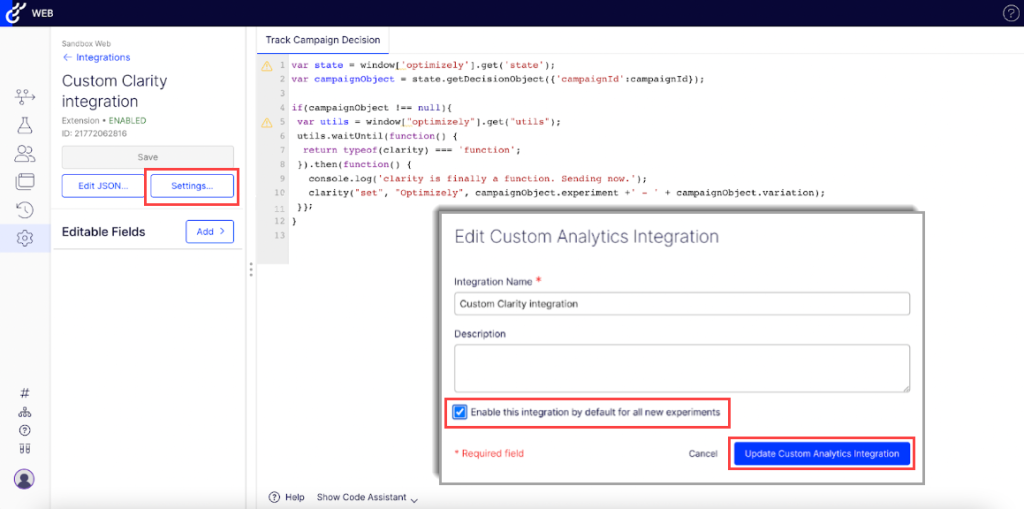
Automatically add to all new experiments using the following steps:

  • Go to Settings > Integrations > Custom Clarity integration.
  • Select Edit.
  • Select Settings. The Edit Custom Analytics Integration window displays.
  • Check Enable this integration by default for all new experiments box.
  • Select Update Custom Analytics Integration to save the changes.

Step 5

Use the experiment data in Clarity:

  • Go to your Clarity dashboard and select your desired project.
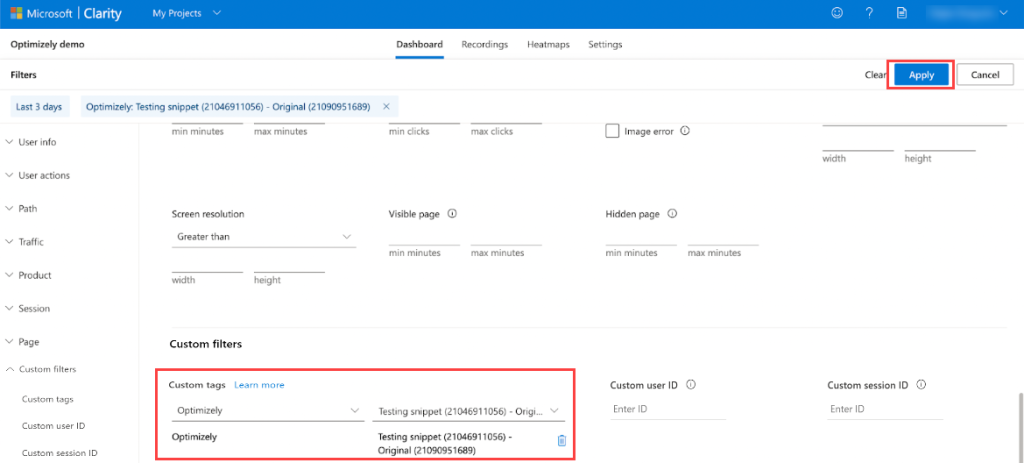
  • Go to Filters > Custom filters > Custom tags.
  • Select Optimizely from the drop-down and your desired experiment/variant.
  • Select Apply.
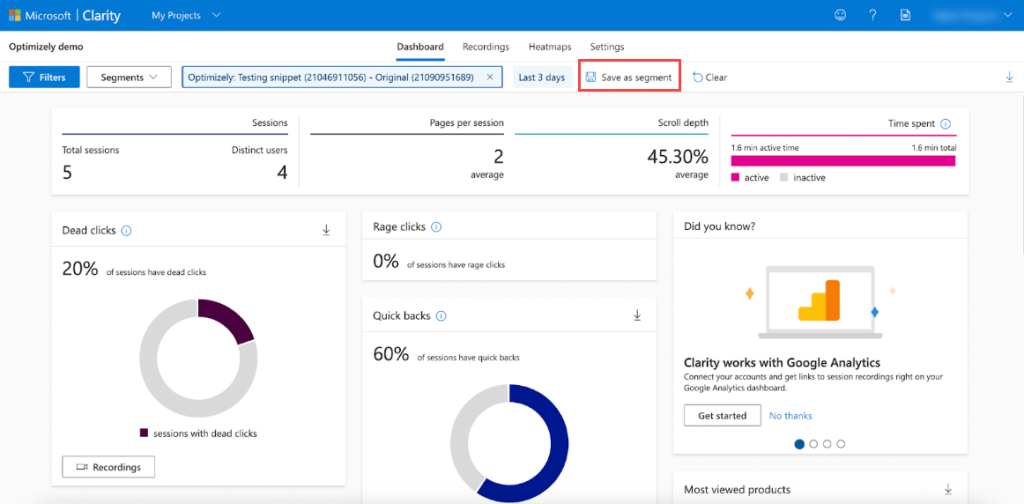
  • Select Save as segment to save this custom filter as a segment.
  • Select Save as segment to save this custom filter as a segment.

After you can go here to verify your installation.